Thursday, December 15, 2016

(Review) TIS TechStream program immobilizer chip key for Toyota Tundra

Here in this article i will share with you my personal experience on buying a China clone Toyota diagnostic tool MINI VCI OBDII cable, that will be a good referance for your purchase.


I lost my immo key on my way home and can not find it anywhere, the next day to get a new one i came to workshop which would charge me nearly $500, that’s really too expensive! I searched on the fourm that whether the key worth this price. Some kind friends told me:

-Program new immo keys for Toyota by with TechStream hardware and software is the best choice which will save you tons of money and time.

-Repair shop is that in the case...

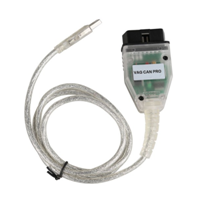
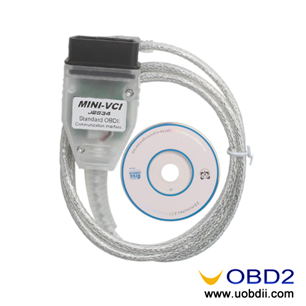
Finally i bought the MINI VCI cable with $26.99 at uobdii.com, very cheap i thought if it worked fine. I received the package 4 days later, after reading its user manual, i began to program my immo key for my Toyota Tundra.
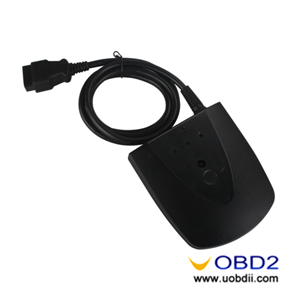
Tools i used:


Here are steps

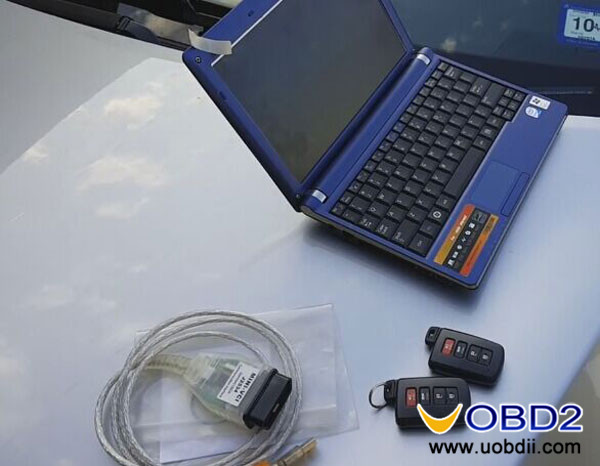
Frist of all, I insert MINI VCI Cable into OBDII diagnostic socket

Next, Connect MINI VCI Cable with laptop and open it


Then I Insert the new key and turn on switch ignition

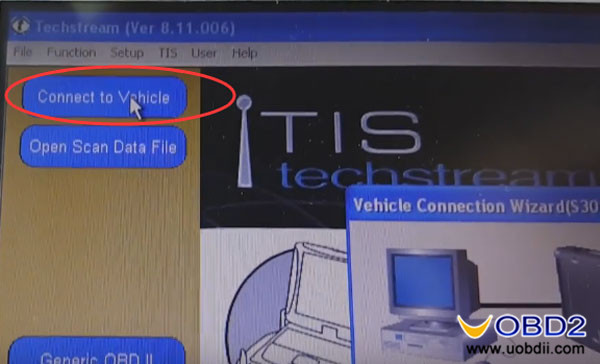
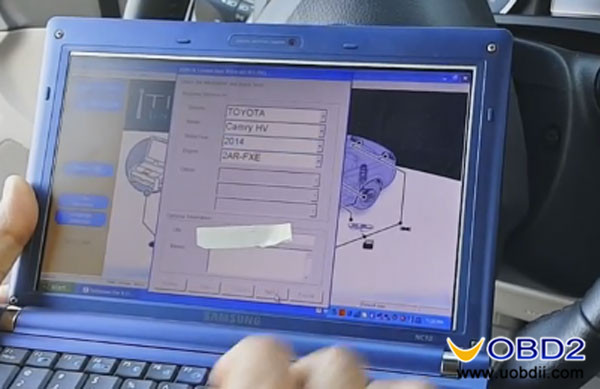
Running tis techstream software and Click “connect to vehicle”


Techstream show me the vehicle information, Confirm, correct! And click Next


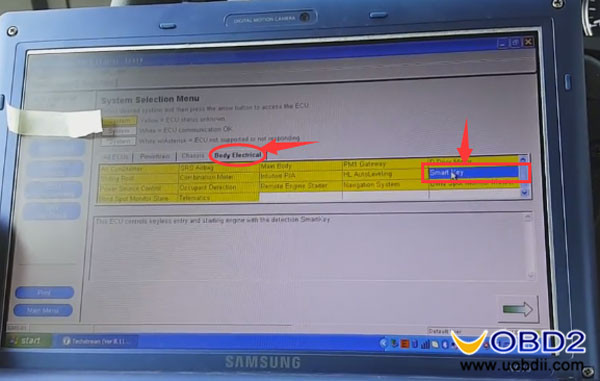
Then Choose “immobilizer” option


Choose “Utility”
Here come to the most important steps

I Choose “immobilizer key registration” and Press next to proceed


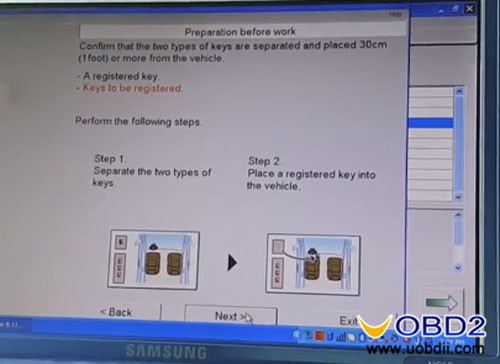
Techstream prompt me to operate step1-3, i just follow the prompt.


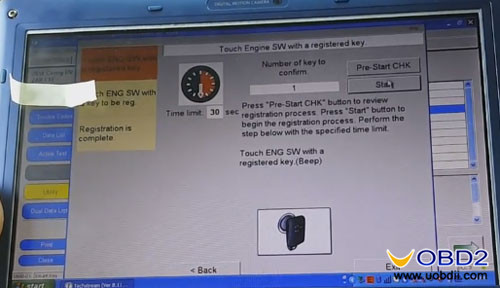
And It is registering now..


Done! Techstream Successfully program key for Toyota Tundra 2013!

I try to use this new programmed key, i find the only difference between this one and my original one is the appearance, their immo function is same with each other!

I am very glad to choose this diagnostic cable, it has save me $400+ , cost-effective!

Monday, December 5, 2016

BMW INPA 5.0.6 download - working ok with K+Dcan cable

BMW INPA 5.0.6 download here, which is tested without issues to work with K+DCAN usb cable with inpa bmw e46 and inpa bmw e90. Enjoy!

INPA v5.0.6 download:
https://mega.nz/#F!JJgynb7L!fthUR3q5JMC7hFf4nuvzPQ
Files incl:
EDIABAS v.7.30, Tool32 v.4.03, INPA v.5.06, WinKFP v.5.31 & NCS Expert v.4.01
(BIG THANKS to the contributor Kenny)

Computer requirements:
OS: Microsoft Windows XP, 7 (32/64bit), 8, 8.1 (32/64bit), 10 (32/64bit)
CD/DVD ROM Drive
1 Available USB Port (We recommend using the same USB port each time)
Minimum 1.2GHz Processor
Minimum 2GB of RAM
Intermediate experience with navigating Windows and installing software/drivers
Note:
You’re advised to use INPA software on Windows XP, tested by professional engineers at uobdii.com. bmw inpa windows 7 and bmw inpa windows 10 need luck

How to install inpa/ediabas:
Install BMW Standard tools 212
Copy INPA_Fxx_v.2 folder to C:\EC-Apps\INPA_Fxx_v.2
Copy EDIABAS to C:\EDIABAS overriding existing EDIABAS Folder.
Run INPALOAD.exe from INPA_Fxx_v.2 BIN folder (C:\EC-Apps\INPA_Fxx_v.2\BIN\INPALOAD.exe).

bmw inpa cable:
K+DCAN USB cable is verified to work no issues with INPA BMW.
bmw-inpa-k-dcan-with-switch
It’s the newest K+DCAN cable, released in the 2016 year with two new futures:
Feature 1: 2016 new k+dcan cable adds a switch on the adapter.
kdcan-inpa-cable-switch
the switch on this cable to LEFT is for 7 pin, to RIGHT for 8 pin
8 pin for K-LINE communication (old DCAN cables cannot do it) for BMW from 1998 to 2008
Feature 2- This usb cable improves a lot in the PCB design. The new pcb comes with FT232RQ chip
kdcan-inpa-cable-switch-pcb-1 kdcan-inpa-cable-switch-pcb-2
the printed circuited board of better quality than the old one
INPA bmw and K+DCAN cable test results:
inpa bmw e46:
Purpose: reset BMW E46 airbag light
Tools for use:
The E46 is before 2000 without the OBD2 port and the DLC port is a round 20 pin connector while INPA cable has only 16 pin connector, so I need a 20 pin to 16 pin connector
inpa-k-dcan-bmw-e46-airbag-reset-dlc-port-1
The DLC port location on BMW E46:
inpa-k-dcan-bmw-e46-airbag-reset-dlc-port-2
Test procedure:
Run INPA software on WIN XP. Turn on the ignition and click the “F2” button. And choose “Body” section then “Airbag”.
inpa-k-dcan-bmw-e46-airbag-reset-3
Go to the Error Memory: click the “F4” button.
inpa-k-dcan-bmw-e46-airbag-reset-4
Go to clear error memory: click the “F2” button.
inpa-k-dcan-bmw-e46-airbag-reset-5
Error was cleared!
reset BMW E46 airbag light successfully!
inpa-k-dcan-bmw-e46-airbag-reset-6

inpa bmw e90:
Purpose: Code BMW E90 (2008) Injector
Tools to use: k+dcan cable
Test process:
connect the INPA cable with my E90 N54 via OBD port
run INPA software. And pressed F9 on the keyboard to select vehicle model E90
bmw-inpa-software-1
select Engine option -> MSD80 concerning option
bmw-inpa-software-2
press F9 system diagnostic
bmw-inpa-software-3
press [shift+F4] EOL injector option
bmw-inpa-software-4
The interface of MSD80 injector coding program, Check the injector parameters
bmw-inpa-software-5
copy and paste the injector code and pressed OK to continue
Notice that the injector code are stamped onto the injector in white, there will be 2 rows of 3 numbers, for example, here: 582 227
bmw-inpa-software-6 bmw-inpa-software-7
Finally check the injector value and press [clear] to reset it.

Sunday, November 27, 2016

BMW Z3 -97 convert miles to km by ADS interface + NCS expert


How to convert BMW Z3 -97 miles to kilometer? Use an ADS interface and code the KOMBI with NCS expert, details as below.

BMW model information:
VDO 883311221 / 1100086445/055A
HW 1.2
SW 7.0

BMW Z3 2.8 -97 US version

EEPROMs
inner 93C46
outer 93C46

Pulled out the dumps with SP200S flash tool


Purpose:
Convert a bmw Z3 dash from miles to KM

BMW coding tool to use:
Use an ADS interface and code the KOMBI with NCS expert.

Guide:
ADS (serial port necessary) or ICOM with C adapter will work. I figured if you had an eeprom reader tool, surely you would have access to ADS or ICOM, even if borrowed.
If you do figure out how to do in eeprom, that's cool and all... But then checksums and other issues you may run to, not sure if worth it. Not trying to discourage, but the easier sure way is NCSExpert coding.

Finally solved:
I have both ADS interface (native serial port) and ICOM, KOMBI module is not accessible via those interfaces. Simple reason: no RXD or RXT connected in kombi.
All other modules can be accessed by ADS, ICOM or OBD - tested and confirmed. 

ADS interface for price $4.99 and ICOM A2 for price $519, $524 in total.

Here ADS interface


Here ICOM A2
More Car diagnostic Tool  pls vistit:http://www.uobdii.com/wholesale/car-diagnostic-tool/

Wednesday, November 16, 2016

VAG Group Diagnostic tool, VAG CAN PRO better than VAS 5054a

This blog will introduce two VAG diagnostic tools, VAG CAN PRO and VAS 5054A ODIS Bluetooth.

Item nameVAG CAN PROVAS 5054A ODIS
Display vag-can-pro-1 vas-5054a-2
Price$49.99$44.99
Support languageMulti-languageMulti-language
Support vehicleVolkswagen, Audi, Seat, Skoda, made from 1990 to 2015.VW,AUDI, Skoda, Seat, Bentley and Lamborghini
Support ProtocolCAN BUS + UDS + K-LineUDS
Package1pc x VAG PRO
1pc x Encryption Dog
1pc x CD
1pc x VXDIAG VCX NANO
1pc x USB Cable
1pc x Carry Case

There price has only a difference of 5 dollars, VAG CAN Pro can completely replaced VAS 5054A. Also, It is better than VCDS in all aspects, it can do some things that VCDS can’t, OCF will make your life much easier, it takes time to understand how this software works, it still need some fixes, it sometimes gives you headache but it’s definitely worth to buy as second software for VAG after VCDS.  It is very good tool for VAG and DGS flash.
The clone VCP USB interface takes US$49.99 Free shipping. (The original VCP scanner costs nearly 300EURO!)
http://www.uobdii.com/wholesale/vag-pro-scanner.html

Comparison
ODIS is OEM, so it fully supports every VAG model, but it’s slow and you need online connection for being able to do a lot of things.
VCDS is super fast, best to read DTC’s and do basic stuff and some coding, but it doesn’t work well with new MQB platform.
VAG CAN PRO VCP is little bit a mix of those, reads DTC fast, every feature is done offline, and work very well with MQB.

How does user think of VAG CAN PRO?
Audi A4 8E B6 owner says:
This model has a can-bus (TP1.6), but it is not connected to the diagnostic socket. The car is fully diagnosed on the K-line (VCP required interface + K). Used protocols KWP2000 and KWP1281 it.
Audi A4 8E, B7 owner says:
This model has a CAN BUS TP2.0, but the diagnostic socket is only connected to the so-called CAN-Antrieb, i.e. Engine, transmission, airbags, ABS, Quattro drive.
In addition, a standard K-line. In other words, VCP fully supports the diagnosis B7 models, but only in the CAN-Antrieb. Other controllers are available through the K-Line and KWP2000 KWP1281 protocols.

You can find more information about the two items here:
SP275: VAG CAN PRO
http://www.uobdii.com/wholesale/vag-pro-scanner.html
SP238: VAS 5054A ODIS
http://www.uobdii.com/wholesale/vxdiag-vcx-nano-5054a.html

Sunday, November 13, 2016

How to choose a diagnostic Tool for Honda and Toyota?

How to choose a car diagnostic Tool for Honda and Toyota?I am going to invest in a diagnostic tool for Honda and Toyota to all trouble codes and need to be ECM programming, KEY programming, and SRS diagnostic.

At the moment I am using Allscanner VCX tool. It can diagnostic Toyota & Honda vehicles but the problem is some functions can’t be supported by it. So I am going to buy a new and powerful tool for my cars.

So I search for advice from forum users which tool is good for my requirement.
From their advice I selected 4 tools and have done some research on them:
  1. Xhorse MVCI 3 in 1 V10.30.029
2012-new-mvci-3-in-1-01
  1. Honda GNA600
gna600-02
  1. Honda HDS HIM
latest-honda-hds-him-03
  1. MINI VCI Cable for Toyota TIS Techstream(with software CD)
mini-vci-for-toyota-tis-techstream-cable-04
After a deeper investigation, I finally decided to buy Honda HDS HIM + MINI VCI cable, the two products totally cost me about $130, cheap I think, and I will tell you why I choose them.
I directly gave up GNA600, with the almost same functions, it is much expensive (nearly $500) than others.
Xhorse MVCI 3 in 1 is a diagnostic tool for Honda and Toyota, in my opinion
MVCI 3 in 1 can do similar job with Honda HDS HIM and MINI VCI, sounds good but some forum users share their experience with me that Xhorse 3 in 1 is not effective for ECM programming & key programming, so I abandon it.
As for Honda HDS HIM and TIS Techstream, two products are respectively designed for Honda and Toyota, functions are also very comprehensive, they can do everything I want. HDS HIM price is $95 and TIS Techstream is $26.99.

HDS HIM for my Honda and TIS Techstream for my wife’s Toyota, very convenient, no need to take the diagnostic tool from the car to another if both cars need to diagnose.

Tuesday, November 8, 2016

How to use MINI VCI Techstream Program Camry Hybrid Key ?

This personal operation reports is written for those people who are about or have been investing in key programmers for Toyota. It will guide you on how to program Camry Hybrid Key with Toyota TIS Techstream.

Tools I used are all here:
mini-vci-for-toyota-tis-techstream-1
  1. MINI VCI CABLE with Techstream software (I got it only $26.99 with free shipping at uobdii.com)
  2. Laptop (O.S: windows XP)
  3. Two keys

First of all I install the Techstream software that comes with the CD.
Second connect my Camry (OBD2 port) with my laptop via this cable 16 pin connector
mini-vci-for-toyota-tis-techstream-2 mini-vci-for-toyota-tis-techstream-3

Then I open Techstream and turn ignition on
Next I click [Connect to vehicle] button
mini-vci-for-toyota-tis-techstream-4
And choose car information, I choose 2014 for my 2016 Camry Hybird
mini-vci-for-toyota-tis-techstream-5
Well, now I can see the [System Selection Menu], I choose [Body Electrical] and choose [Smart Key]
mini-vci-for-toyota-tis-techstream-6
Then I click [Utility] button and choose [Smart Code Registration]
mini-vci-for-toyota-tis-techstream-7
These are something should be noticed when begin programming smart key
mini-vci-for-toyota-tis-techstream-8
I choose all options and click [Next] to continue
Techstream shows me the number of new codes available and number of registered key codes
Then click [next]
mini-vci-for-toyota-tis-techstream-9
And it reminds me to separate the original key with the registered key and place a registered key 30cm or more from the vehicle.
mini-vci-for-toyota-tis-techstream-10
Next, I press [Pre-Start CHK] button to review registration process and press [Start] to begin key code registration
mini-vci-for-toyota-tis-techstream-11
Then I put the new key touch Engine SW in 30 seconds. After that I take the registered key away from my car for a while.
mini-vci-for-toyota-tis-techstream-12
Done! It shows me that key code registration is complete
mini-vci-for-toyota-tis-techstream-13
Finally, move away the cable and Exit the program.
Video guide:
https://www.youtube.com/watch?v=-75s0MyrLFI
The whole process is rather simple, only need several minutes, and the total cost is much lower than the same job you will be charged for $300 in a garage. As I know, this Toyota TIS Techstream VCI cable can perform other functions like read and clear DTCs, SRS, immobilizer, it is awesome!  I highly recommend this cable to Toyota owners!