Sunday, July 31, 2016

BMW ENET cable to do BMW F-series coding


Received my BMW ENET cable and did some DIY job for F30 already.
This BMW ENET (Ethernet to OBD) Interface Cable is designed to work on BMW F-series alone. Let’s go straight to the point.

You need:
A BMW ENET cable
E-Sys program, datafiles, token and PIN
A PC/laptop running Windows XP system (mine second-hand Panasonic Win xp 64 bit OS)
Just spending a little money and you will get a powerful ENET cable for 11.00 without postage. I recommend get one from UOBDII.COM which offers good technical support. Usually, after he receives payment, they can have the cable shipped as soon as possible and arrive with you between 3 to 4 days.
I have found some clue on how to solder the cable list as below. Better understanding with the pictures guidance.


The package comes with E-Sys program, datafiles and such which enable me to use directly without downloading. I was offered E-Sys v3.18.4 in combination with the v46.3 datafiles. I have to mention that the datafiles contains more than 10GB memory, so you have to take hours and hours to download it all. And you have no choice but to wait patiently.


Then please refer the pdf guide here E-Sys – MacOSX installation and configuration.pdf to start install the E-Sys. As soon as you start the vehicle, the E-Sys program will automatically saves the CAF files into “C:ESysDataCAF”. Then copy all these files on to the certain folder.
After that, please do as the following steps:
1) Connect the laptop to vehicle and click the connect symbol
2) Select “F20”(not F020 direct) and click connect. Close the popping out message when you see your car VIN, if not, repeat the progress again.
3) Accept following windows message and close the program
4) Switch to coding mode, go to expert mode and click on coding icon on the left vertical pane.
5) Come to the coding program. Click Read button under the VO pane and then FA appears
6) Now Click on Read VCM or Read button under VCM pane. You will find it it will be on your right hand-Center
7) All the ECU’s will display on the main program. Then expand the ECU’s and all most all ECU’s will have a file starting with CAF (With green indicator) right click on the CAF file and select Read coding data, ignore whose who did not contain CAF. But remember do not click all CAF files. Four or five is the maximum.
8) After complete above procedures, go to c:/esydata/CAF. All the .ncd files have been generated on the CAF folder.
9) Copy .ncd files and on your pc or laptop. Run the software program and then start to do F30 coding according to the window instructions.
I have successfully realized these things by using the ENET cable:
–Remove PDC + cam disclaimer
– Mirrors open automatically when closed with comfort access
–Change DVD region code
– Remove disclaimer
– Video in Motion
– Turned the Seatbelt Gong off
– Side View Cameras on at all speeds
– Change DVD region code
– Tire pressure + temperature in TPMS
– Mirrors close by pressing doorknob (comfort access only)
– Disable A.S.S. by default (can still be enabled but starts with setting ‘off’)
– Remember last setting of A.S.S. (works only when not disabled by default)
– Change ringtones

I am still working on it and will figure out more functions later. I have to clearly that these are all the tested result on F30. I am not sure how other F-series works.

Article from:http://blog.uobdii.com site:
How to use BMW ENET cable to do BMW F-series coding

Friday, July 29, 2016

Customer Experience with JLR Mangoose OBD2 Cable for Jaguar and Land Rover

An increasing number of people buy and use JLR Mangoose for Jaguar and Land Rover
from uobdii.com, why it is so hot? The answer is that many users speak very highly
of JLR Mangoose.In the following parts,I list a real uobd2 customer's experience.
Customer shares his experience in jaguarforums.com:
“I don’t have any experience with that kit, but several of us are successfully using the one at the link below:
Promotion JLR Mangoose for Jaguar and Land Rover V138 Support till 2014 Year
The one I bought came with SDD V134. I had previously understood that V131.03
was the latest version that could be used without an active subscription to TOPix,
 so I purchased that version of the software separately. But after additional
research, I installed the V134 software and it’s working just fine with WiFi
turned off (otherwise it wants to try to log on and update itself). The seller
stated that V134 only worked with 2005 vehicles and later, but its working fine
with our 2004 XJR. I don’t know about the V138 that the uobd2 is now offering.
You should ask them to be sure it will work with your ’07.

Note that for V131.03 and V134, and I believe for V138 also, you must run the
program in Windows XP 32-bit. I first installed it on an old XP laptop, then
after more research I successfully created a Windows XP virtual machine on a
Windows 7 laptop, and that’s what I’m using now. I haven’t worked on the
ABS or airbag systems, but I believe SDD has that capability. I have used SDD
to recalibrate our air suspension ride height, pull P, B, C and U codes, turn
off the automatic setting of the Electronic Park Brake, turn off some of the
annoying alarms, etc. It’s the dealer-level tool, so if the dealer can do it
you probably can too.”

JLR is really only $49.99 free shipping????
“So am I understanding correctly that for 49.99 you got the Mongoose cable AND the
IDS/SDD software? I was under the impression that it cost loads of money but
maybe I’m confused.”—— Confusion from another customer’s.
jlr confusion
This is a clone version and yes, that is the correct price. Obviously, you will
receive no warranty support from Jaguar on either the cable or software, but
several members are using that setup successfully. —–uobd2 claim: actually, 
uobd2 items sold to customers have fine warranty support, read complete 
details at:
http://www.uobdii.com/info/uobd2-after-sale-service-363.html

Wednesday, July 27, 2016

Review on selecting Techstream Customize Functions: Gen III

I purchased Techstream and a min vci cable from a Chinese seller for $19 to do some customize settings on a 2010 Prius.
I used:
Laptop with Windows XP 32 bit
Xhorse mini vci cable with Teachstream 8.10.021 from uobdii.com
Note:
1- new software- toyota-techstream-10.30.029.zip or toyota-techstream-10.10.018.zip – should be ok
2- many Techstream cables in China, but some bad with white PCB
TIS cable of Quality A comes with green PCB


Model:
2010 Prius
First attention please!!
The USB to OBD2 VCI cable driver will only run on a 32 bit computer. Even with an old 32 bit Win XP computer, I had to load/reload the cable driver 3 times. Once done, it is great.
Your owner’s manual covers the customizable features built into the car.
To get to the customizable features, connect the laptop to the car OBD2 port just under the steering column. Start MINI VCI Techstream and depress the brake pedal and press the cars power button. Techstream should connect and ask you the options on the car (radar cruise control and sunroof). It will also pop up with the VIN number and ask if you want to save it.

After that it’s easy. Just select the third tab from the left, Customize


Next select one of the Customize Functions and a small box will pop up with parameters


If you click on the parameter, an explanation will show in the Item Description box below. After you are done selecting parameters, click on the arrow in the bottom left of the small box and it will ask you if you want to save. Select “Yes” and move onto the next Function. You will be amazed at the options you have. You can even turn off the seat belt beeper on the driver or the passenger side or both.
I turned on 4-door unlocking and turned the backup beeper to only 1 beep. You can turn on/off the remote button functions. Actually, my dealer inadvertently turned off ALL of my remote functions and was not able to turn them back on. This was my main reason for digging into MINI VCI Techstream TIS interface. I was also able to program a new remote Key Fob using the Smart Key Menu on the fourth tab.

Hope you all have fun with this!

Monday, July 25, 2016

BMW INPA software, what hardware OBD2 cable is the best?

Many FTDI FT232RL based cables can be modified to work with INPA software for BMW diagnosis. And they are cheap as hell. Here list all possible INPA hardware cables.

First of all, INPA software can be downloaded free here:
Bmw inpa software freedown and setup instruction
INPA driver: http://down.uobdii.com/inpa-driver.zip
INPA software: http://down.uobdii.com/inpa-2.zip

List of INPA cables:
BMW INPA K+DCAN cable with FT232RL chip
Ediabas ADS/OBD interface
 Non-ADS Ediabas OBDII RS232 interface
INPA + 140+2.01+2.10 4 in 1 BMW Scanner
Carsoft 6.5 interface
BMW ICOM A2+B+C emulator

Using experience:

BMW INPA K+DCAN cable


This is a typical FTDI based interface. This is the current most used cable for INPA.
With the USB K+D CAN type cables there are a few installation steps, drivers & a little software that you need to make them work properly. This does 2001-on cars right up to & including 2011 cars (may be limited by the hookie software for cars after June 2008 on a diminishing basis as the car gets newer). This cable is a USB enabled device, again you will need to install the USB to serial drivers. However you will also need to install the K+D CAN utility, this allows you the ability to switch it from a K CAN device for pre-2007 cars (see list above) to a DCAN cable. There are two versions of this utility, a fancy GUI & a MS DOS one. I find that the MS DOS one works best.

Hera’s an image of what this cable looks like:


Ediabas ADS/OBD interface Serial Port cable


As mentioned previously the ADS interface is a different protocol, if you don’t have an ADS interface with an e36 then what you’ll be able to read with a regular OBD cable is limited. Unfortunately the ADS interface seems to be the hardest to get & most expensive of all the interfaces. It works fine on the e36, e39 & e63 (note my e63 is pre-March 2007) from my personal experience.

Suitable for e36, e34, e30
Here’s a picture of the Ediabas ADS interface:


Non-ADS Serial port interface


This is a cheap interface & is readily available plus requires no modification. It works just fine on E46/E39 with either the round 20 pin connector under the bonnet or the OBD2 port in the drover’s footwell. Set up of this cable is straight forward, no drivers required.


INPA + 1.40+2.01+2.10 4 in 1 BMW Scanner


This is a interface contains four software of BMW scanner INPA K DCAN cable + BMW DASH E6x V2.1.0 + BMW Scanner V1.4.0 + BMW Scanner V2.10 cable. The scanner comes with INPA OBD, ADS interface and none ADS cable for all all systems (K-line and CAN-BUS) of BMW series and OBDII diagnostic system.


Carsoft 6.5 Interface


CarSoftware interface can be modified to work with INPA, but it is not recommended. When you first got INPA, you have to run a carsoft test to “initiate” the lead every time. What a PITA, stay away from this solution! The black serial cable below only works on OBD1 cars like pre 2001 e39 and this will work for all K CAN (e36, e39, e46, e53, e63).


BMW ICOM A2+B+C emulator


BMW ICOM Rheingold not only comes with basic ISTA-D ISTA-P diagnostic & programming software, it comes with lots of engineering software, INPA, EDIABAS, WinKFP, NCS-expert, NCS-dummy etc. So INPA is well loaded to BMW ICOM A2+B+C diagnostic system, but you need to do some configuration work. This is quite good for experts and technician.

Saturday, July 23, 2016

New Ford “One Stop Electronics” Cable Tests results

UOBD2 release a new Ford knock-off for mileage/ odometer correction and key programming on USA Ford vehicles. This is the test result about the FORD OBD TOOL.
Tested tool:
Ford OBD2 Cable Diagnostic Tool
PCB display:


Easy installation with the help of the video guide:
https://mega.nz/#!8h1SWQgQ
Tested function:
Km change;
Key program
Tested vehicles:
Focus 2005…km change ok
Focus 2009…key program ok
Focus2 Restyle 2008…km change and key program ok
Focus3 2011…key program ok
C-Max 2008…key program ok
C-Max color 2008…key program ok
C-Max 2012…key program ok
S-Max 2006…km change ok
S-Max 2012…key program ok
Galaxy 2006…key program ok
Galaxy 2007…key program ok
Galaxy 2013…km change ok
Galaxy 2014…km change ok
Galaxy color…key program ok
Mondeo 2007…key program ok
Mondeo 2008…km change ok
Mondeo 2010…km change ok
Mondeo color 2012…km change and key program ok
Mondeo 2010…key program ok
Fiesta 2006…km change ok
Fiesta 2008…key program ok
Fiesta 2011…km change and key program ok
Fiesta 2013…key program ok
Fiesta 2014…km change and key program ok

Article from:http://blog.uobdii.com/new-ford-one-stop-electronics-cable-tests-results/

Thursday, July 21, 2016

SUBARU FreeSSM V1.2.5 OBD2 Cable diagnostic tool software installation

This is the instruction on how to install / make the SUBARU FreeSSM V1.2.5 software and OBD2 diagnostic Cable work.


Operating system:
Windows XP, Vista and Windows 7

Language:
English, German


Steps to make the software and adapter work
Step 1 – Plug in your SUBARU OBD2 Cable, let your computer find the drivers automatically.
If not the cables usually come with a CD with the drivers, use this.
If not do some searching on the internet.
It really depends on which cable you get.
Ps. The OBDII cable from uobd2 required no setup, plugged in, found, done. Works on Windows XP, Vista and 7 OS.
Step 2 – Install the software
On the main screen go to Preferences
On the drop down: Serial Port
Select which COM port your adapter is on
If you have no idea with I am talking about:
On your keyboard hold the windows button and push Pause/Break
Click Device Manager
Select Ports (COM & LPT)
Your adapter should be listed here
Right click the adapter, select Properties
Under Port Settings, Advanced you can see which port it is on, you can change this to another # if you want.
This path may be different depending on which OS you use.
Step 3 – Plug into the OBD II connector with the key on and “Test Diagnostic Interface” under Preferences.
If it all checks out you are good to go.
Software:
Here are some screenshots of FreeSSM V1.25 software.
Click on either Engine or Transmission

Preferences


ECU Capabilities
Codes


Here in the Measuring blocks you can click the + sign and select what parameters you want to view real time data from.
Select as many parameters as you want.


Adjustments


Functional Tests, you have to connect the green connector under the dash for this to work.


TCU Capabilities
Codes


Measuring Blocks


Adjustments
If you look closely there is 1 parameter that have been changed.

Article from:http://blog.uobdii.com site: How to install SUBARU FreeSSM V1.2.5 diagnostic cable

Tuesday, July 19, 2016

How to install NBT iDrive for BMW F series

This is a useful tip aimed to help BMW NBT iDrive installation shared at a BMW f30 forum. Now, it is quoted here for all to learn.
**WARNING**
Disclaimer:
I do not guarantee expressly or implicitly, nor take on any legal responsibility and any responsibility about the correctness, the exhaustiveness or the usefulness of any information of this installation guide, as well as its usage. Proceed at your own risk, always consult with a qualified automotive electrician.


Sunday, July 17, 2016

BMW ENET Disable the BMW F10 LED Sidemarkers

This is procedure of disabling BMW F10 LED Sidemarkers with ENET cable and E-sys 3.26.1, which gives the car a European look.
Tool:
ENET (Ethernet to OBD) cable


Software:
E-Sys 3.26.1 Torrent (not tested yet by obdtool)
ESYS 3.22.5 and V49.4 data (tested and secure)
First, connect to the car using Esys 3.26.1:

Friday, July 15, 2016

JLR Mangoose SDD cable can test DDM module?

Today I installed SDD v135 and here it showed a blue bar ( only visible is you clicked beside manual or automatic ).
After selecting automatic it started to upload but coudn’t connect to DDM


Nearly all of the previous DTC codes are still erased except these :


Wednesday, July 13, 2016

BMW Navigation Map Update – FSC Codes Generation

Here is an instruction on how to extract your DE (NBT) or 1B (CIC) file, generate the FSC code for BMW F series.


Prequisites:
ESYS ENET Cable
PSDZData Lite (lite version is fine for FDL coding, you only need the full package if you want to flash ECUs)
Token (not required to reach FSC Extended)

To get the E-sys and psdzdata files, go to
http://www.uobdii.com/wholesale/bmw-enet-ethernet-to-obd-interface-cable-e-sys-icom-coding-f-series.html

CIC PREMIUM 2014 Maps:
http://www.e90post.com/forums/showthread.php?t=893113
NBT NEXT 2015 & 2016 Maps:
http://www.e90post.com/forums/showthread.php?t=995629

Monday, July 11, 2016

NCS Expert OBD2 Cable for BMW E60 E61 CIC retrofit coding

This is a guide for how to use K+Dcan cable retrofit a CIC system to BMW 2010 E61 which previously had MASK Nav. You can do BMW E60 CICI retrofit coding with the help of the cic retrofit instruction here, and maybe it is relevant to other models but please check first. First thing is to source all the bits you need. For BMW diagnostic tool, you can try items at uobdii.com. The list below is what is needed to go from MASK NAV to CIC with part numbers. In this case there is less to change than if going MASK-CCC or CCC-CIC as the connectors on the rear of the Head Unit are different. Luckily I had the MASK system so some parts were compatible which saved money.
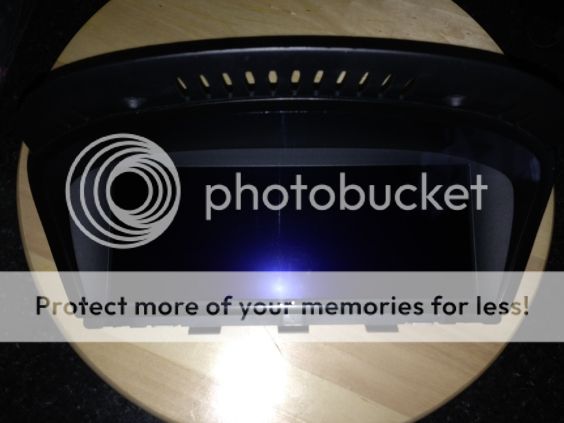
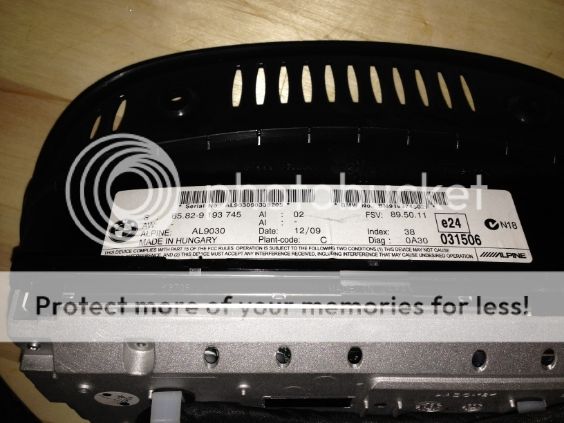
On-board Monitor (CID) 8.8” – 65 82 9 193 745
CIC Head

Sunday, July 10, 2016

OBD2 Cable solved BMW 2000 E39 523i ASC / ABS airbag lights on

This post begins with one car owner’s Euro version of a 2000 E39 523i and its ASC/ABS/airbag lights on symptoms, then followed with the BMW scanners advice.

Car model and year:
Euro version of a 2000 E39 523i

Car symptoms:
  • ASC/ABS/airbag lights on but, had no the codes read
  • some of the door locks are not working
  • reverse distance sensor is also non-functional

BMW scanner advice
INPA – need rework and soldering
For your use INPA will be the best, because of the ease of install, and simple repair needs.

If I were you, I’d buy this cable http://www.ebay.com/itm/301504092069 (for E39 you should bridge pin 7&8, soldering is fine) and just in case you should get the 20 pin adapter
http://www.uobdii.com/wholesale/bmw-20pin-to-obd2-16-pin-connector-free-shipping-1446.html

Do not install anything on the disk that comes with that cable. You will just use this driver pack http://www.ftdichip.com/Drivers/CDM/…0Certified.exe, and then set up INPA.
You’ll be able to do everything to BMWs older than 2006 with that setup.

INPA (and friends NCSExpert, WinKFP, Tool32) is easy to set up, and very powerful to use for diagnostics and even programming, but it’s a little hard to navigate and figure out things at first because it doesn’t have an extremely easy user interface.

INPA K+CAN scanner with FT232RL Chip – plug and play
For the first beginners, or the technician who are not experienced with the retrofit and soldering mentioned last parts. The easier option is to buy one INPA K+CAN scanner with FT232RL Chip, it is plug and play tool without rework and soldering.

If I were you, I’d buy this one $25 free shipping:
http://www.uobdii.com/wholesale/bmw-inpa-k-can.html
It is an OBD2 to USB interface for BMW cars.BMW INPA K+CAN allows full diagnose of BMW from 1998 to 2008 cars.BMW INPA K+CAN is built in 2 lines K and D-can magisterial.

You will just use this driver pack http://www.mediafire.com/download.php?1329lmik8g0c7nc

ISTA/D and ISTA/P – New and easy to use
Easy to use: Others like ISTA/D ISTA/P are very new, and some like ISTA/D are very easy to set up and use, but getting them to run on older cars (without the ISTA specific connection interface) is not always possible. But they’re very easy to use.

Keep update and fix bug: Besides, ISTA/D and ISTA/P keep updating, such as ISTA/D and ISTA/P already update to the newest Rheingold ISTA-D 3.48.30 ISTA-P 3.55.2.001, which is compatible with Win8 System.

With programming tool: NCSExpert, WinKFP, E-sys, EDIABAS, inpa

GT1/DIS – not available in the market
GT1/DIS is a huge pain to set up and run, dealing with VM and the slow speed of it. However it has a nicer user interface and easier to navigate, and GT1 /DIS is not available in the market in China so far.

Friday, July 8, 2016

Step to use BMW ENET OBD2 Cable E-SYS to encode BMW F-series

Follow my contribution, more chewed it impossible, was the steps I used BMW ENET (Ethernet to OBD) Cable to encode my car and everything worked out, are the most up to date software, I used PSdZData_Full!


OBD Cable used:
http://www.uobdii.com/wholesale/bmw-enet-ethernet-to-obd-interface-cable-e-sys-icom-coding-f-series.html

Bmw Coding Database
http://www.bmwcodingdatabase.com/

E-Sys (Includes E-Sys v.3.26.1 & E-Sys Launcher Premium 1:05 (w / Builtin Token Generator) & Guides):
https://mega.co.nz/#!p5JijaKY!DrkkiLi9AUebQOp1sTC0ywopaKXqzEqjYx7Oz45jU14

* NOTE: If upgrading from a previous version E-Sys, first uninstall current E-Sys version via Windows Control Panel.

“E-Sys – Installation Instructions – v.8.pdf” (E-Sys Installation & Setup Guide):
http://www.uobdii.com/upload/pro/bmw-enet-ethernet-to-obd-interface-cable-installation-instruction.pdf

v.54.2_PSdZData_Lite:
https://mega.co.nz/#F!dghFRQgY!79e-cyQ3sFVISPH02g6x4g

* NOTE: 54.2 PSdZData Lite Version has the SWFL files removed Which are needed only for flashing new onto ECU’s firmware, and ARE NOT needed at all for any coding, so you get a time and bandwidth friendly 6.4 Gb download instead of the 25.3 Gb download , and- When extracted it is 9.4 Gb instead of 34.2 Gb, saving 24.8 Gb of Hard Drive space.

Or if you actually need the full version is Flashing:
v.54.2_PSdZData_Full:
https://mega.co.nz/#F!Zo4UCKrT!gq2ekXxtVsT7xZgf-7xE5g

* NOTE: 54.x PSdZData requires E-Sys 3.23.4 or higher version.

* NOTE: If upgrading from a previous version PSdZData, DELETE and REPLACE old PSdZData folder with new PSdZData folder (Do NOT copy (merge) PSdZData new folder on on top of old PSdZData folder).

* NOTE: Downloading files from MEGA is best accomplished by disabling any AntiVirus software, and using Chrome Browser with the MEGA Extension. Do NOT use Firefox. For muti-part rar archives, you must download all parts, And Then When finished, open only part1.rar, and it will automatically process all parts of the .rar archive.